So many people have asked me to share instructions and photos of my closet that I thought it would make a good post, so here goes… Most of what you need to know can be understood by just looking at the pictures. Just a note before I get on a roll here, you’ll just have to e-mail me if you don’t understand something because I KNOW what I did, but putting that into words sometimes gets difficult. Anyway, thanks in advance for your understanding.
The entire closet, with the exception of the original closet trim and base boards and my dressers and mirrors, is constructed from 3/4 inch premium plywood (very smooth on both sides), 1″ x 1 1/2″ strips of pine, and steel closet rods and hardware (to prevent any sagging or breaking).
Step 1 – Make your plan. Measure your space and draw it out on graph paper so you will see what works and what doesn’t, and trust me, do it in pencil. Change and arrange and even customize the pieces to your specific needs until you’re happy.
**Just a note – Be exact with your measurements. Take them 2 or 3 or even 10 times before you cut your wood. Make sure you also measure floor to ceiling so you know how tall you can make your units.
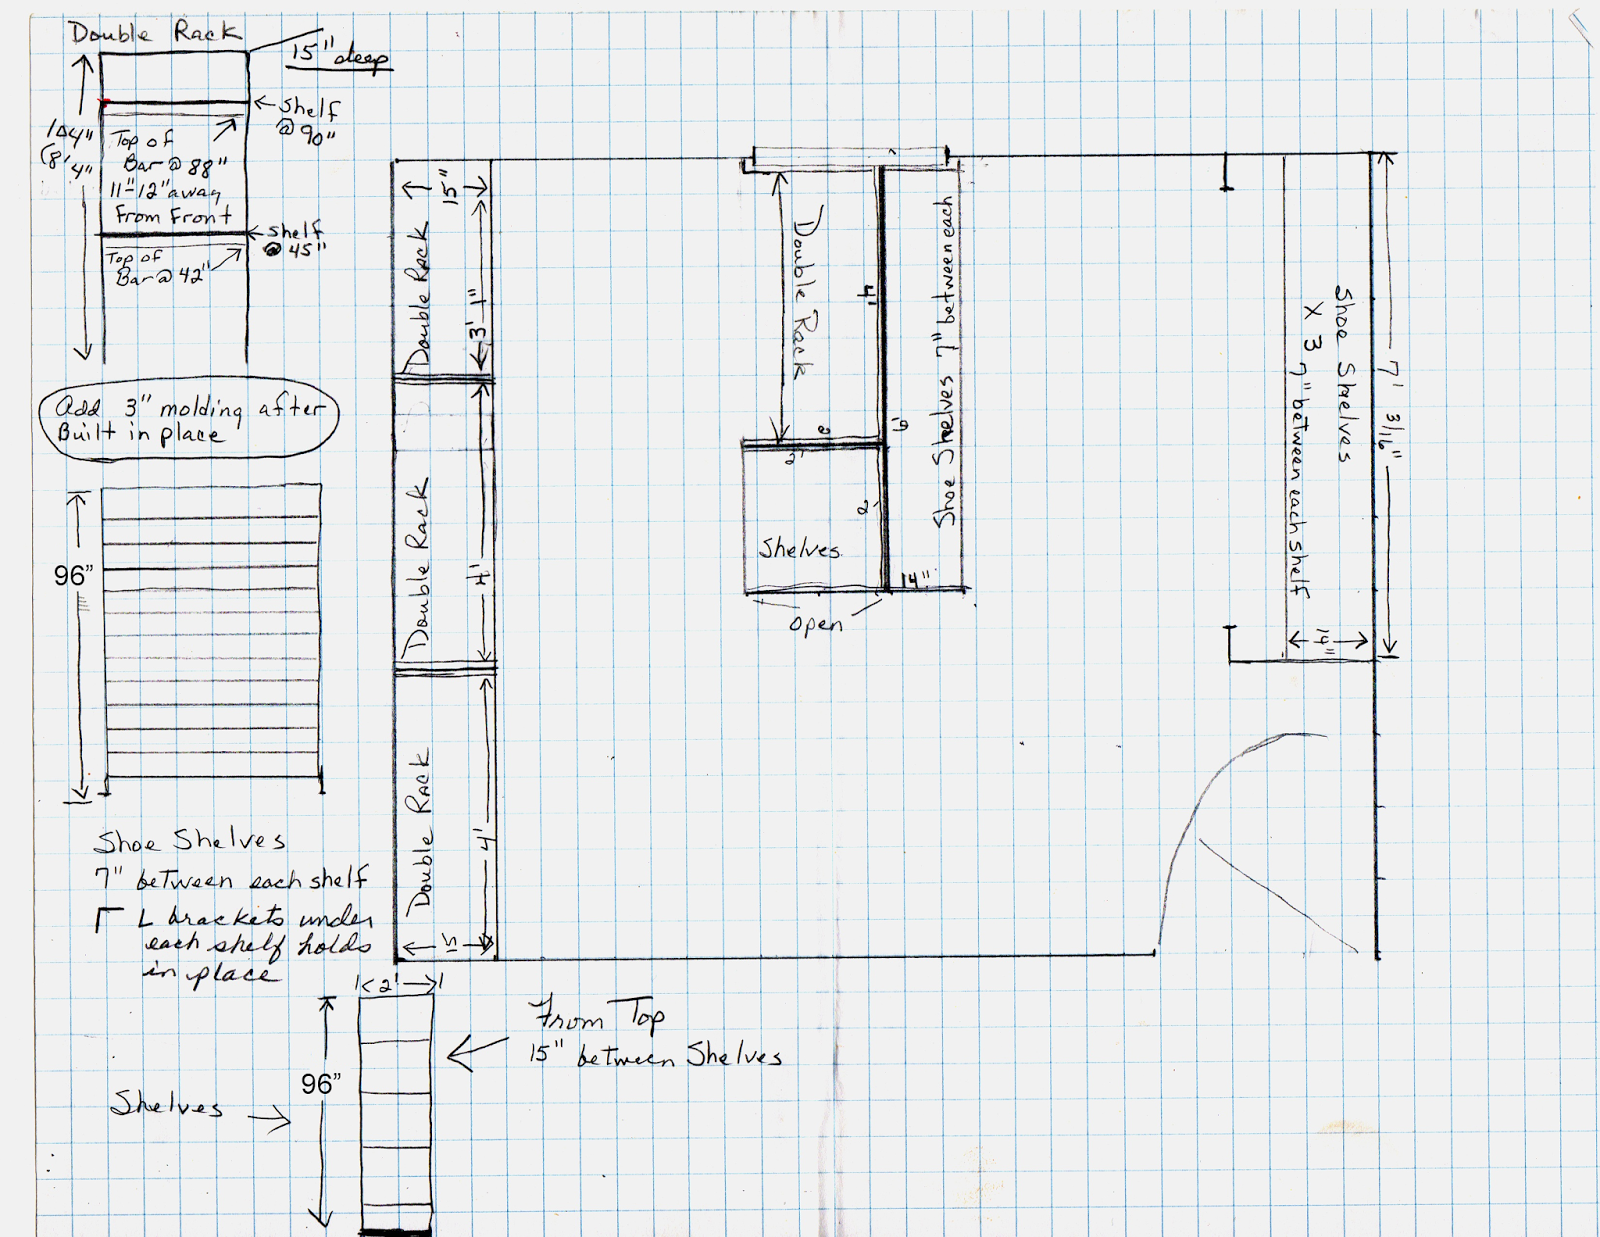
This is what my final plan page looked like. Each piece in place and outside the room layout is the description and dimensions of each of the pieces that I wanted to build.
I’m going to bounce back and forth from plan to pictures so you can see what you will be building.
You may not use all of the pieces that I did so I’ll show you using the pictures what each piece is called on the plan and you can determine if you will use mine or make your own version.
Step 2 – Make your shopping list – Knowing that plywood comes in 4′ x 8′ sheets, determine how much you will need for your plan. While your at it, you will also need to calculate how many feet of the 1″ x 1 1/2″ lumber you’ll need to trim out your units. Are you going to tear out the original closet header like I did? If so you’ll need to measure for the casing lumber and trim you need for that too. The same thing with L-brackets and closet rods and make sure you have a good supply of 1 1/4″ finishing nails (which is mostly what I used to put everything together with). At this same time you’ll need to determine whether or not you are going to stain or paint your units and if you are going to stain will you be able to work with the base board that is currently in the room or will you buy new, and if your buying new how much will you need (linear feet)? If you’re painting you might as well choose the color and pick that up at the same time. My point here is save yourself as many trips as possible because once you get started you’re not going to want to have to stop and go back to the store.
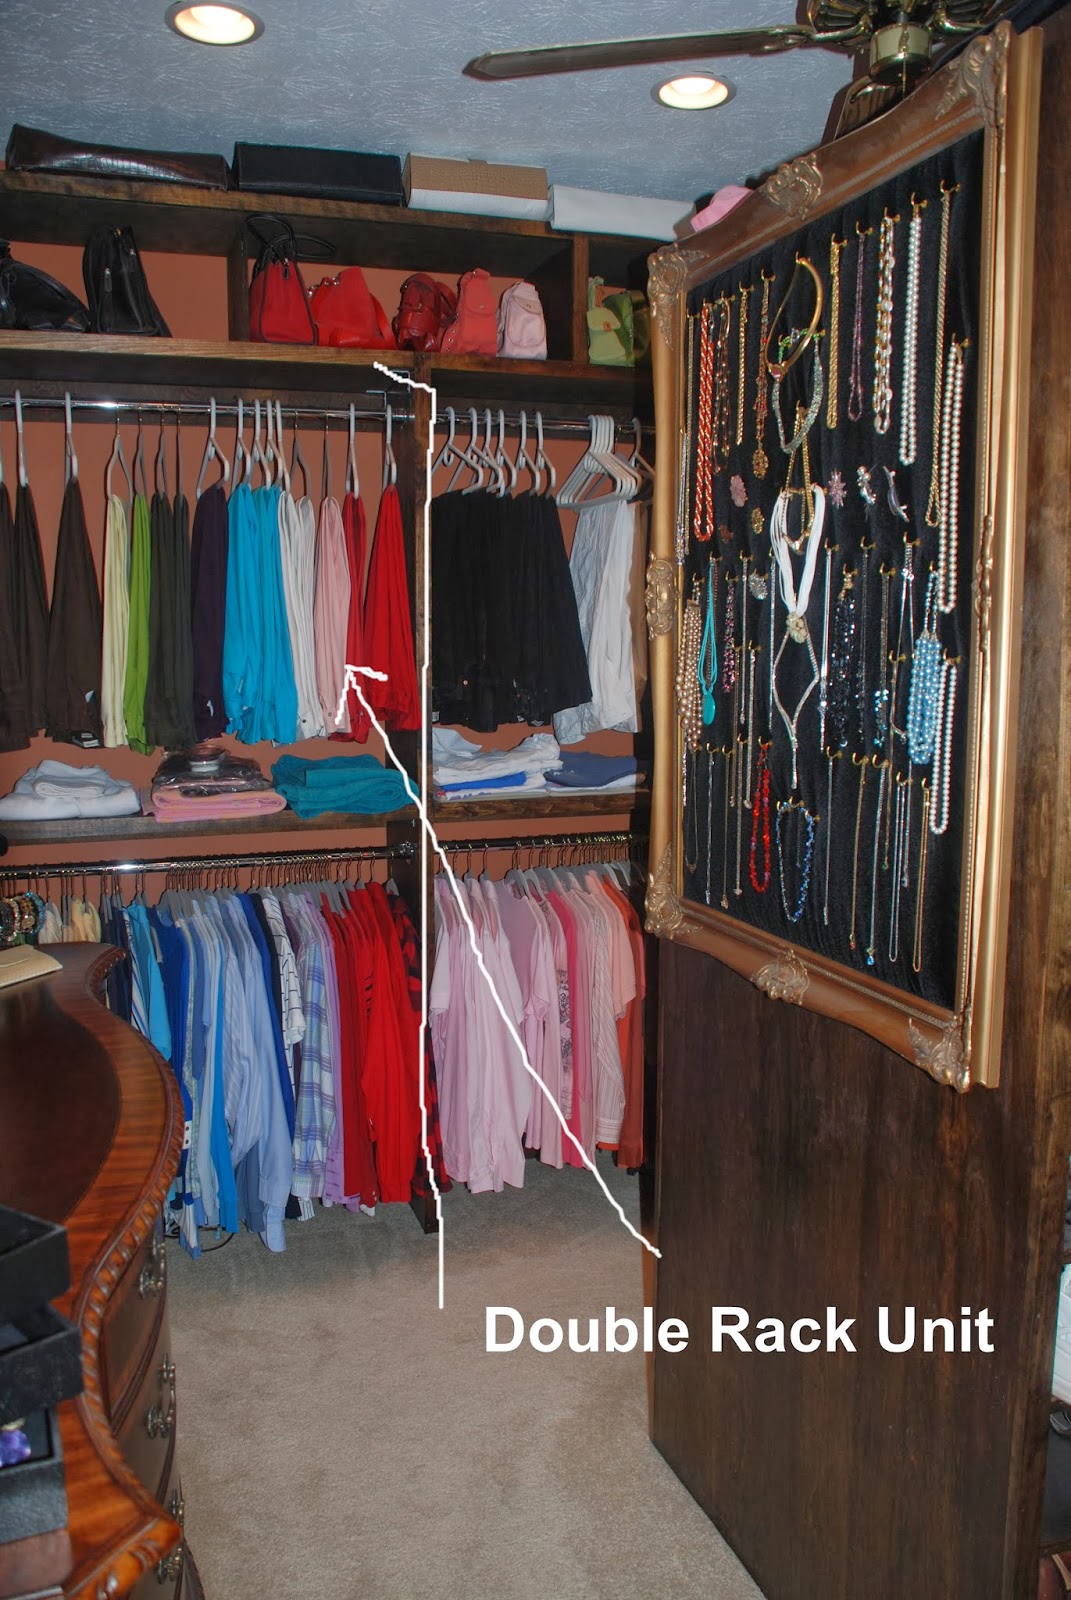
Step 3 – Choose which piece to start with and go to work. For the purpose of instruction, I’ll start with the Double Rack Unit.
In my floor plan I have 4 Double Rack Units. My ceiling height is 9′ and I am tall so my units are tall. You might want a shorter unit or you might want to utilize every inch like I did. So customize yours to your needs. The total height of my Double Rack is 90 3/4″. I have a 13 1/4″ – 3 sided shelf sitting on top of my double rack for purse space, making the total height 104″. For placement of shelves and bars/rods and brackets, remember to include the thickness of your plywood when measuring.
This picture shows the completed unit
These next 3 pictures show the shelf supports, trim, rod and rod hardware
In the Double Rack that sits in front of the only window in this room, I cut and hinged two doors (upper & lower), to allow access to the window for fresh air, for cleaning the window and the blinds, and in the event of an emergency. As a bonus, I don’t have to worry about anyone peeking into my closet.
**Note – For this 3 unit section in the middle of the room I had to remove the excess portion of the wooden window sill so that the unit would sit flush up against the wall.
Next are the two 3-sided units I made to store purses that sit on top of my Double Racks.
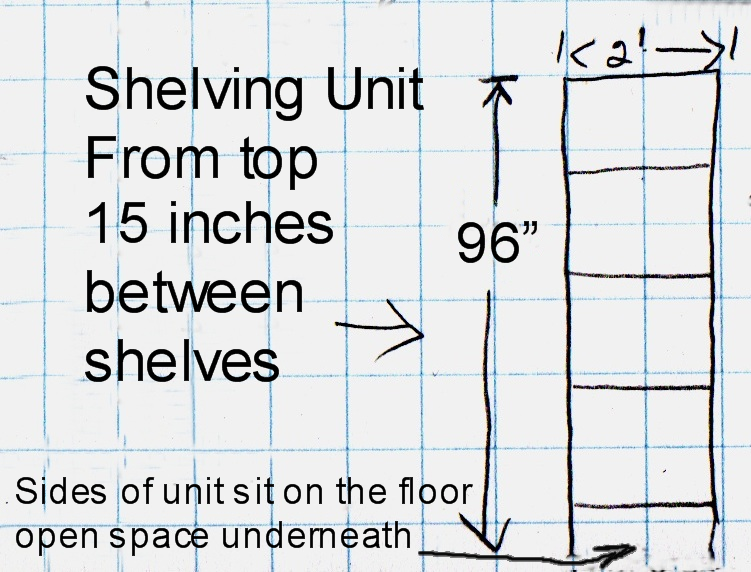
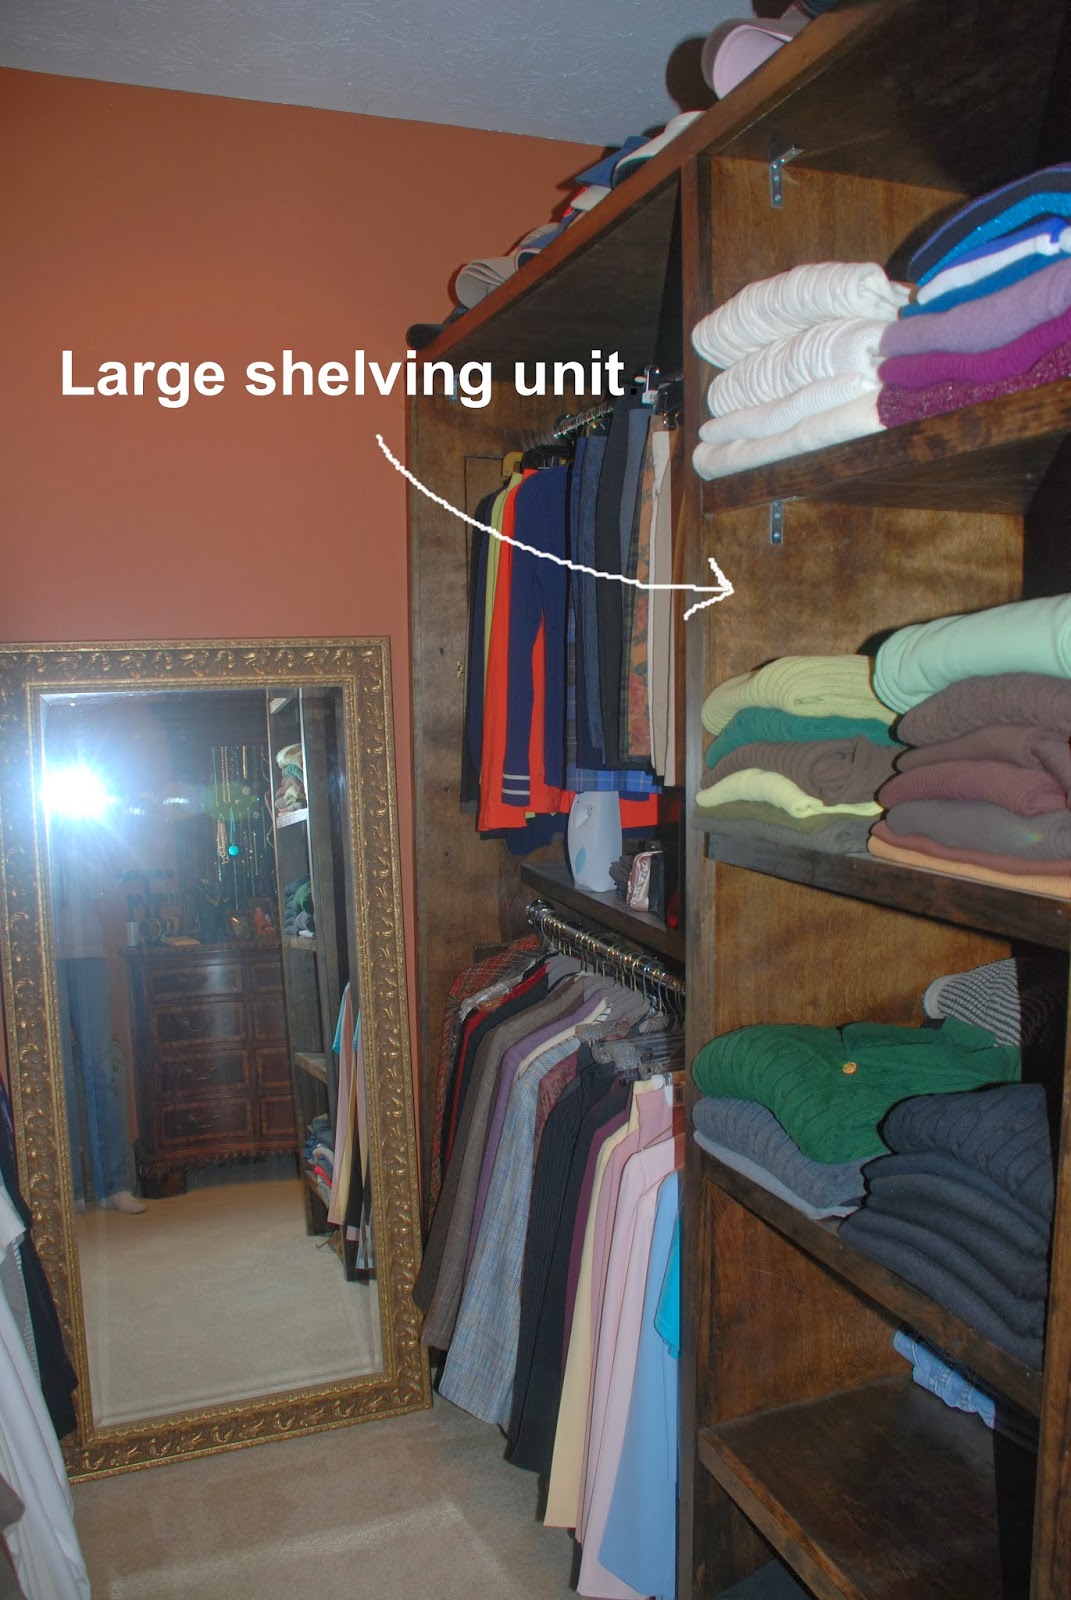
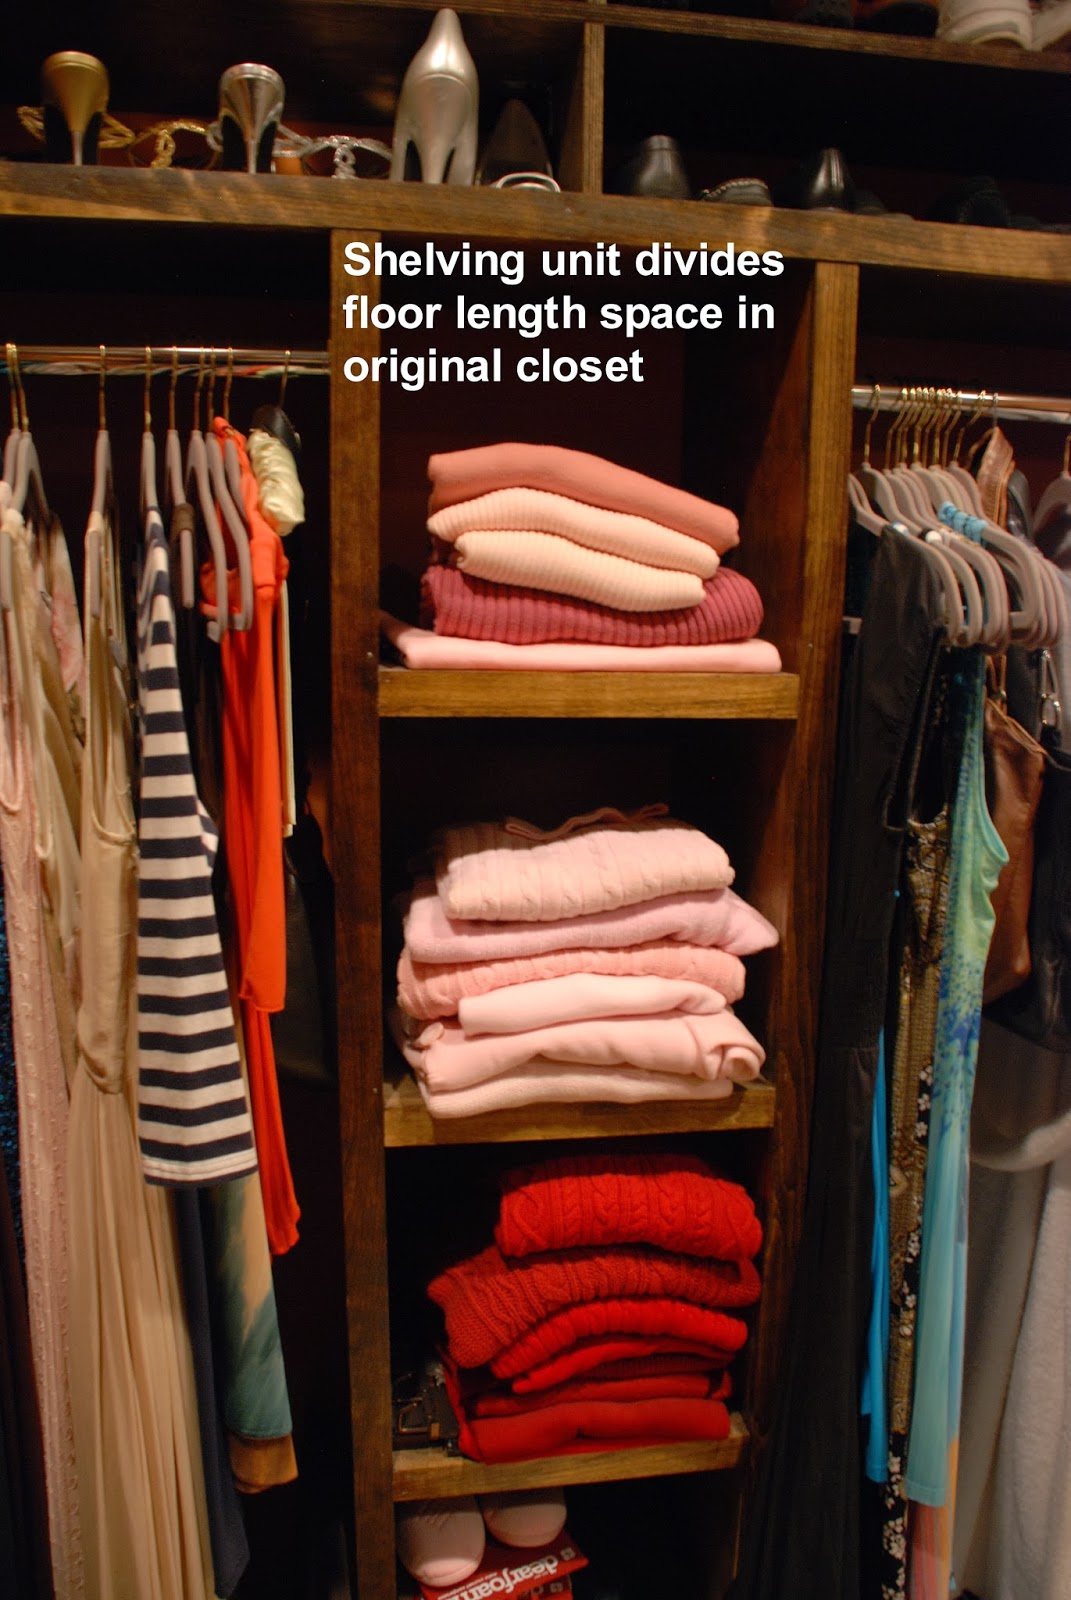
Moving on to the Shelving units, this one is in the window unit.
This one is in the original closet space and has smaller dimensions remember to customize according to your space.
Lets’ talk about the original closet
As you can see in the picture below, I removed the closet header to open up the space and added more … shoe shelves. All I did was carry the original closet cased opening up to the ceiling and put new stained trim on it. It makes access to everything in the top of the closet a lot easier and it helps open up the space visually.

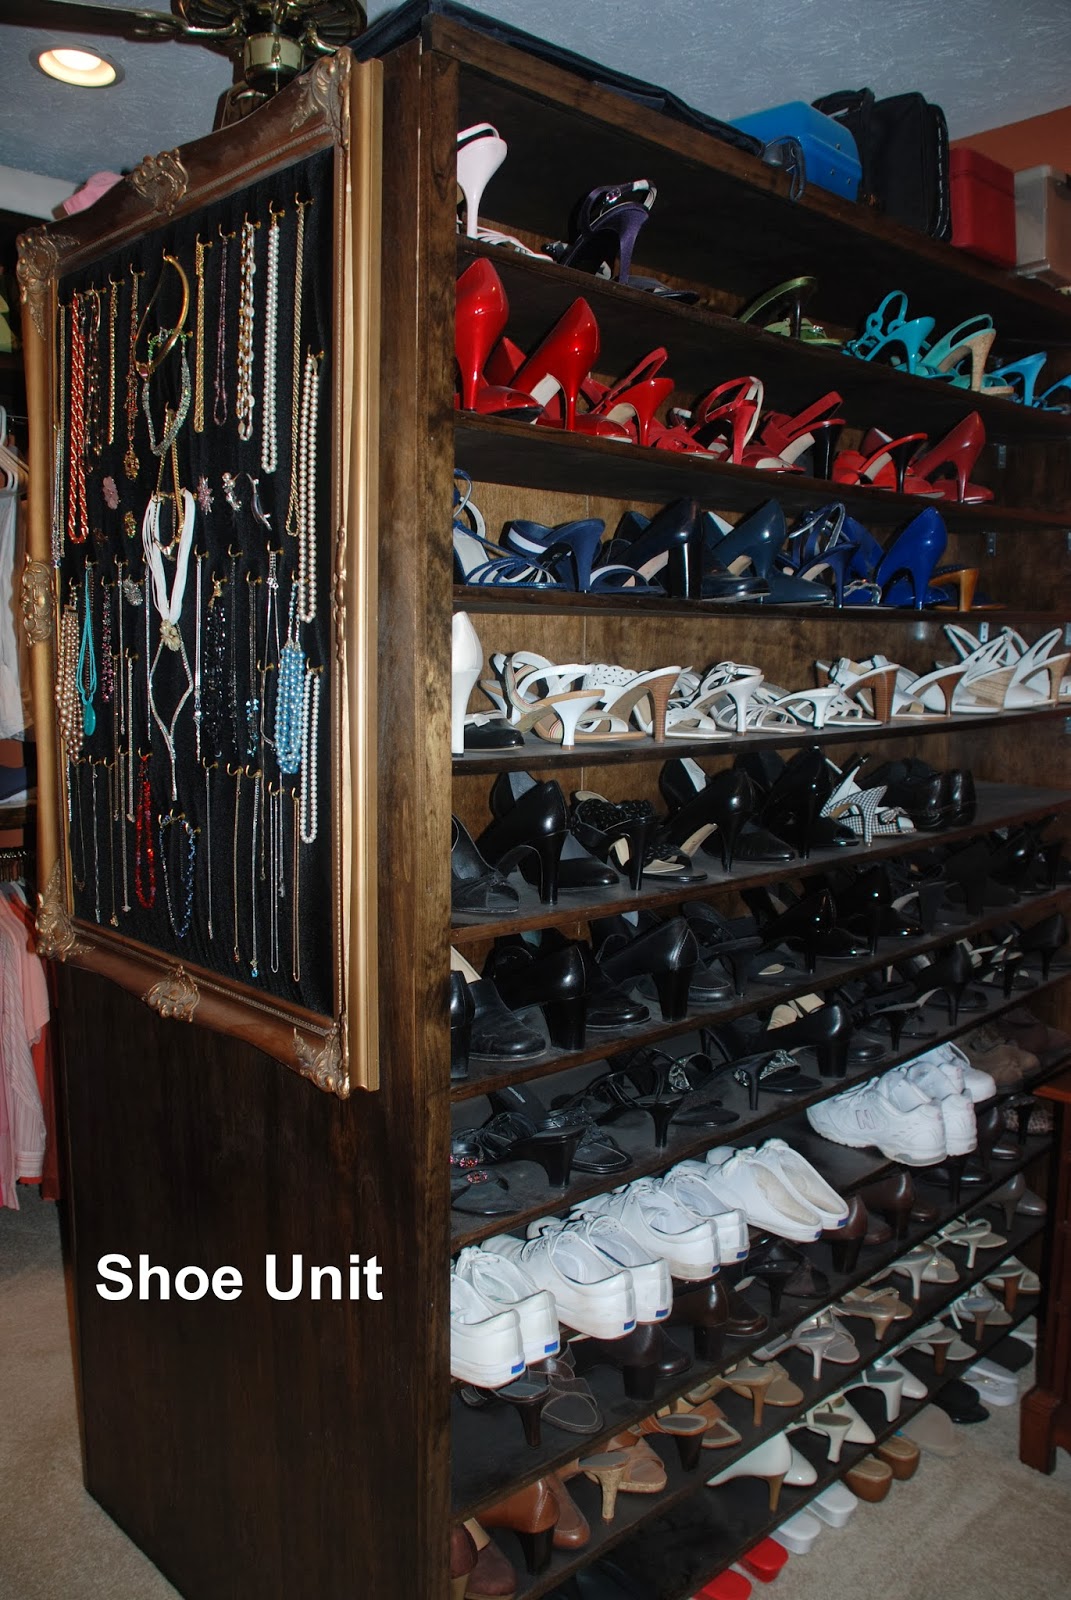
All right, last but most certainly not least is the SHOE SHELF UNIT!!! For most of us we can hang our clothes in every closet in the house and be… not happy, but okay. BUT, and this is big but, we want or need (I don’t know which), our shoes to be… well… how do I put this… All together? No… organized? No… able to find them? Uh displayed HELLLLOOOO? Yep, if we’ve got even a good amount of shoes, we want to see them. We don’t want them in boxes under our bed. We don’t want them in someone else’s closet. We don’t want them mixed-up in a mound in the floor of our own closet. Nope! We want our shoes to have their own space. We don’t necessarily want to see them every time we walk into the room, but it’s exciting to have a great way to store our shoes, and for me this was it.

** Just a note – For your measurements, measure the tallest pair of shoes you have to get the spacing for your shelving and make sure that you add 1 more inch to that, so you don’t scrape up the tops of them when taking them out and putting them away!
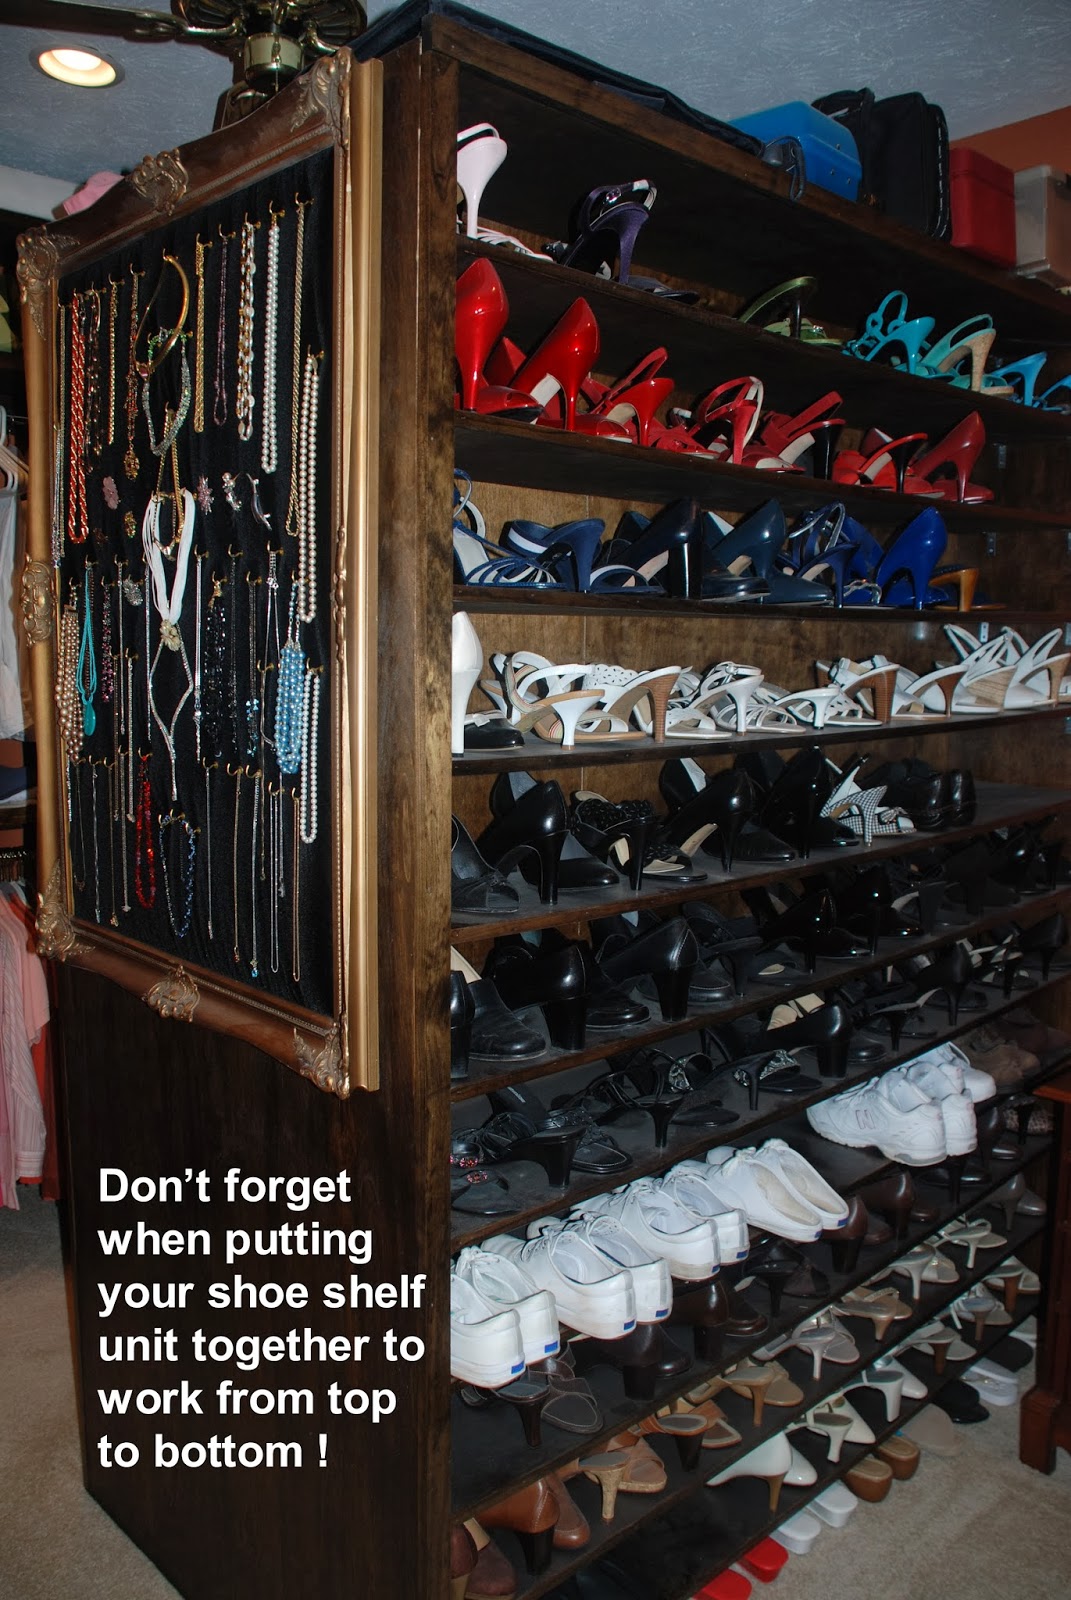
*** Another Very Important note – When you’re building this unit, (I had it laid down when I put it together), work from what will be the top shelf down to the bottom shelf. That way when you attach your L-brackets, there is room for you to work, and you’re not trying to finagle a drill or screw driver between two shelves.
I added these next two pictures just for fun. I don’t like to waste space, and the end of this unit was just begging for something so…
Well that’s it! Pretty simple right? I hope that you’ve gotten some new ideas for what you can do with your space and that the tips I’ve given help.
Good luck with your closet projects, I’d love to see what you come up with!
I’d love to have your feedback… what do you think?


