Whether it’s for your Fisherman’s man cave, to hang by his favorite chair or to light up his desk, this is a fun and useful re-purpose that will definitely make a statement! This project is super simple and took less that 2 hours of time! The Only part of this project that is not re-purposed is the 11′ wiring kit I used for the light itself.
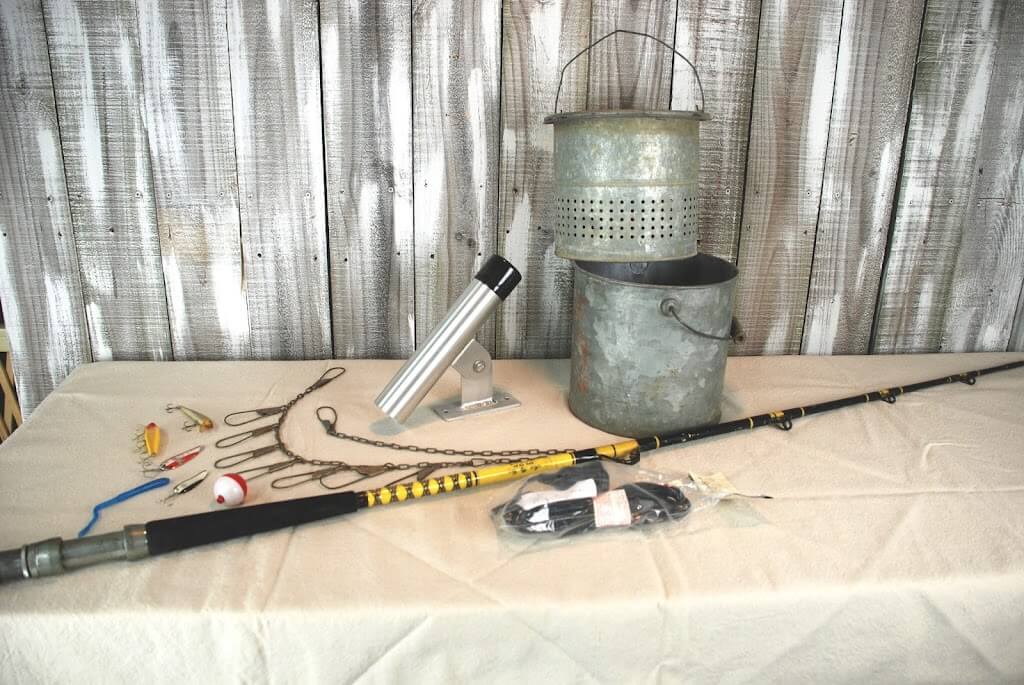
List of items to collect: 1 bait can
1 fishing pole (I used a deep sea pole, with a high weight limit)
1 metal clip stringer
1 fishing rod mount
several spinners or lures to hang from stringer
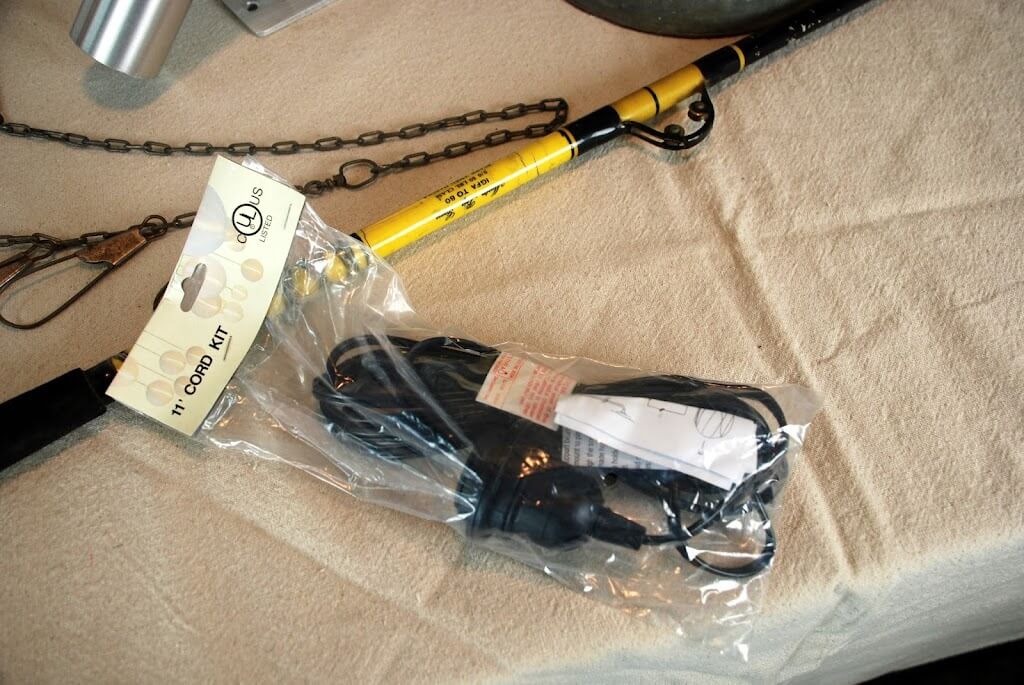
1 – 11′ or 15′ electrical light kit
16″ piece of bailing wire (sturdy wire)
Tools you will use: Tin snips
Manual can opener
needle-nose pliers
I Gathered what I needed
A bait can is normally a galvanized can with another galvanized can inside of it, both with handles. The can that fits inside the other is the liner and usually has a lot of holes or dashes. (Something perfect for emitting light from.) It also has a hinged lid that also has holes in it.
My particular can also had a Styrofoam section that I removed.
I used the can opener to cut the bottom out of the liner can.
I used the needle-nose pliers to crimp around the edge of the can to get rid of any jagged edges. This worked perfectly and now the edge is smooth and I don’t have to worry about cutting myself when I change a light bulb.
This is what it looked like after cutting and crimping.
I don’t have a picture of this next step sorry, but I traced around the light socket on the lid of the liner with a sharpie, and used the tin snips to cut that small hole.
This picture is blurry but it shows the light socket from inside the liner can and how it was centered on the lid. The light bulb will hang down from this point.
So all of my cutting is done and now I take apart the light wiring to string it through the fishing poles eyes. Just like a fishing line. Adjusting the wire and leaving enough hanging down so that the can has the clearance it needs to hang straight. I have had packages of wiring that have the instructions to remove the socket on it, but this one didn’t have them. Luckily you can just look at it and see how it comes apart. The key is remembering how to put it back together. Make yourself a step by step list if necessary. Don’t be scared! It really is simple.
My light wiring package.
You want the part of your wiring that plugs in to be down at the fishing pole handle end, and the light fixture part coming out of the top, and usually the smallest of holes at the opposite end of the pole.
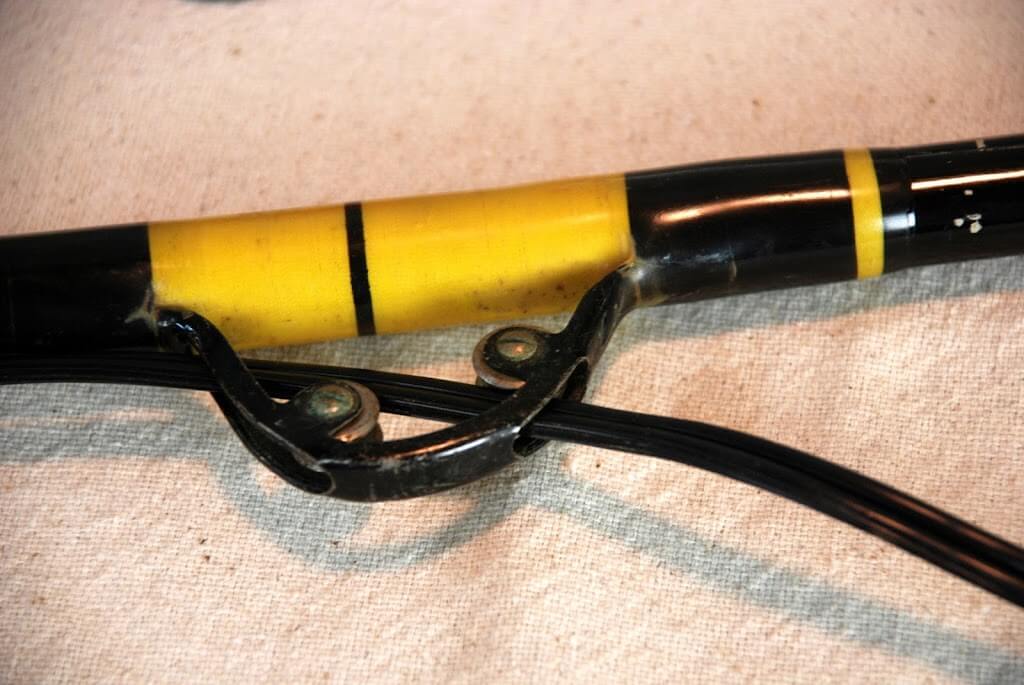
Shows how I fed the wiring through each eye on the pole just like fishing line.
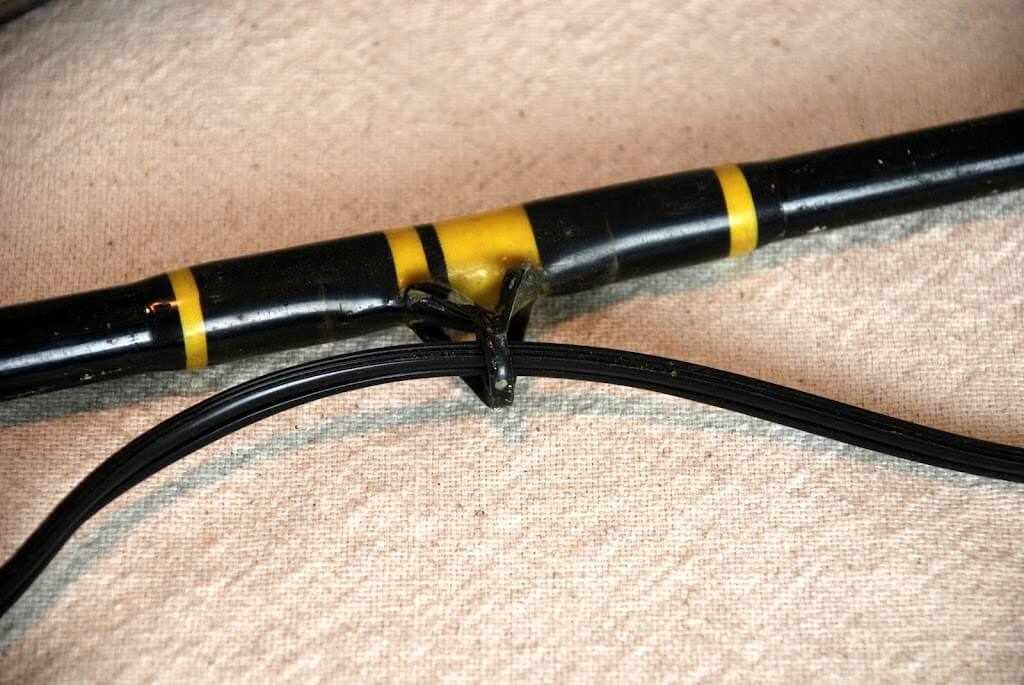
This one shows my socket as I put the pieces back on the wire.
This one shows how I left some wire hanging between each eye. I think it exaggerates the fact that it’s thread on like the line would have been.
This one again to show how the socket went through the lid and is screwed securely to support the can. Just to be safe, you need to know that there is a 4 lb. weight limit put on the connection of the socket to the wiring on most of this type of kit. That is why I used an additional security measure by adding a piece of scrap bailing wire to run from the last eye to the handle of the liner can. This supports all of the weight.
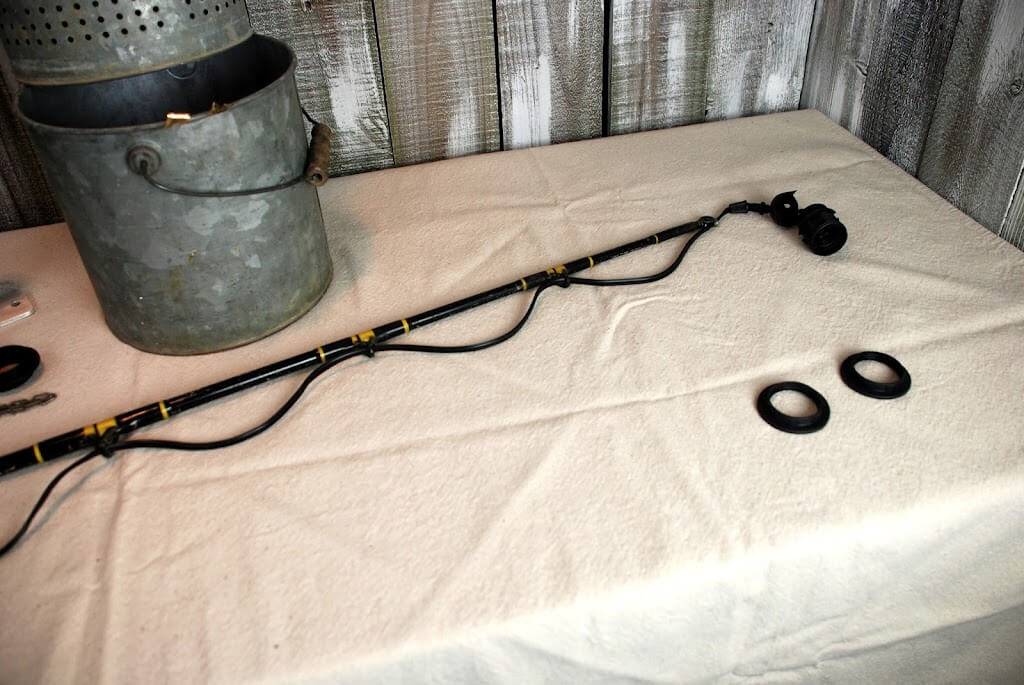
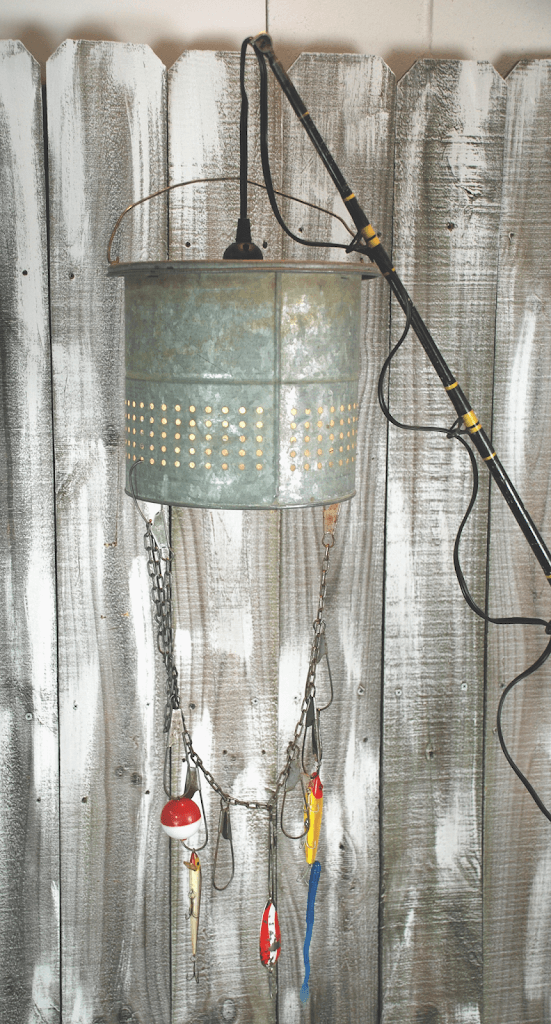
This shows what it looks like with the electrical wiring done.
By this point in time, I have spent about an hour and a half.
Including adjusting my wire up and down to get my desired effect.
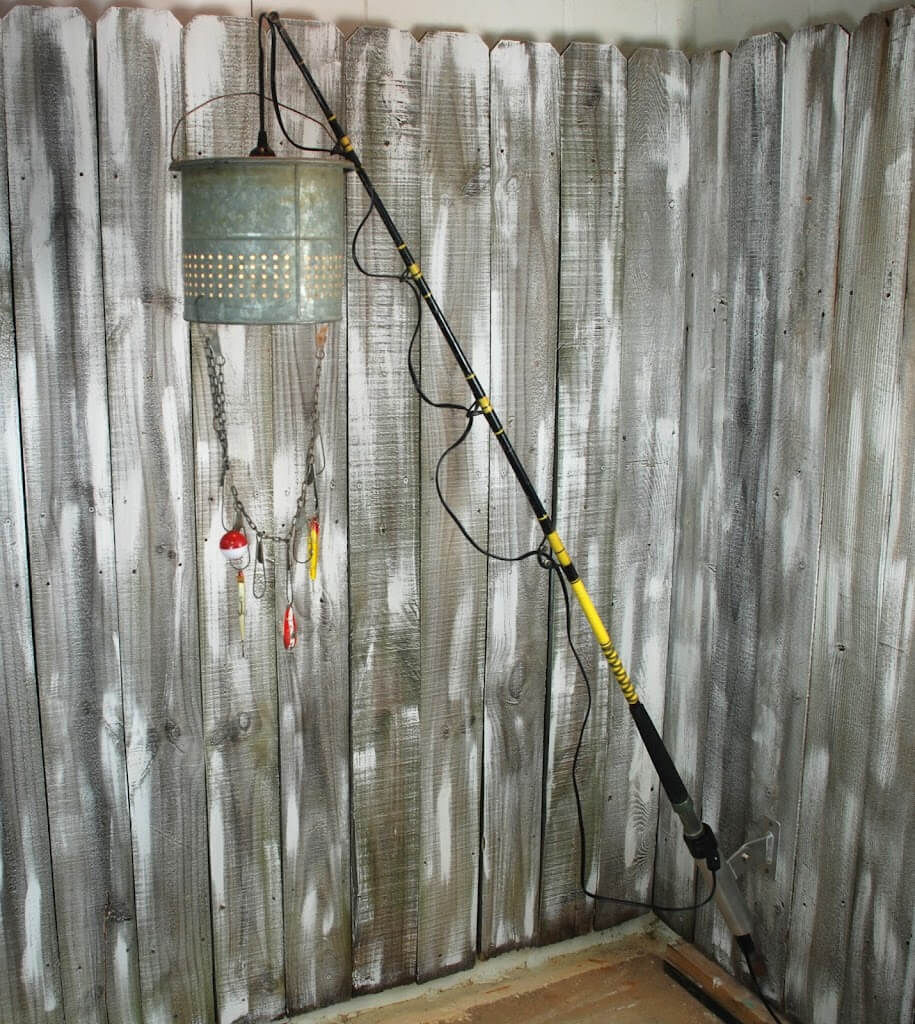
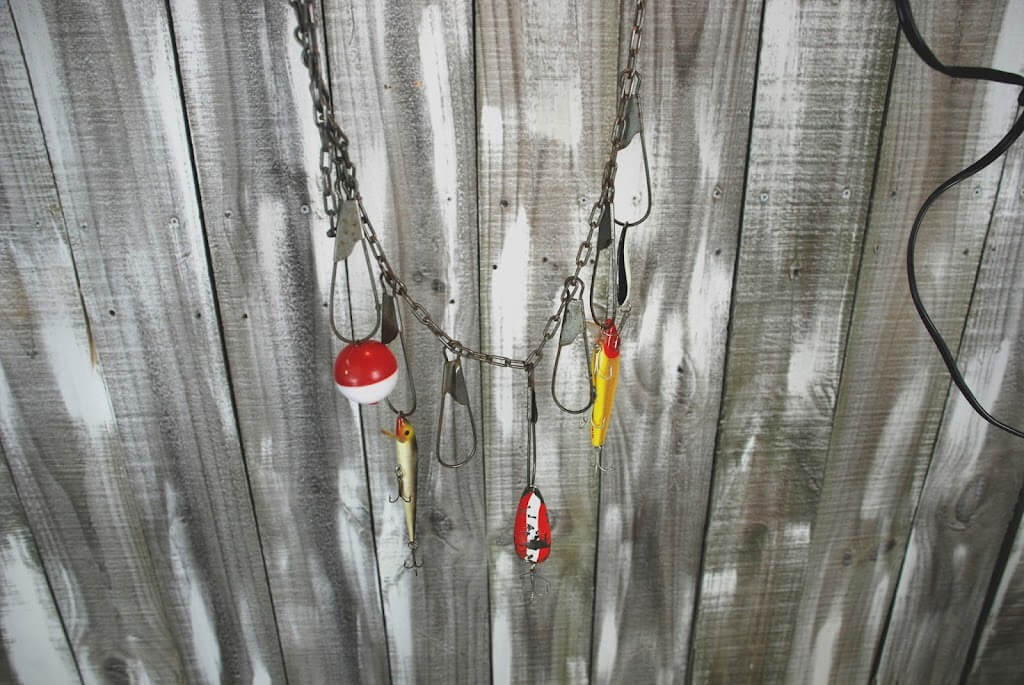
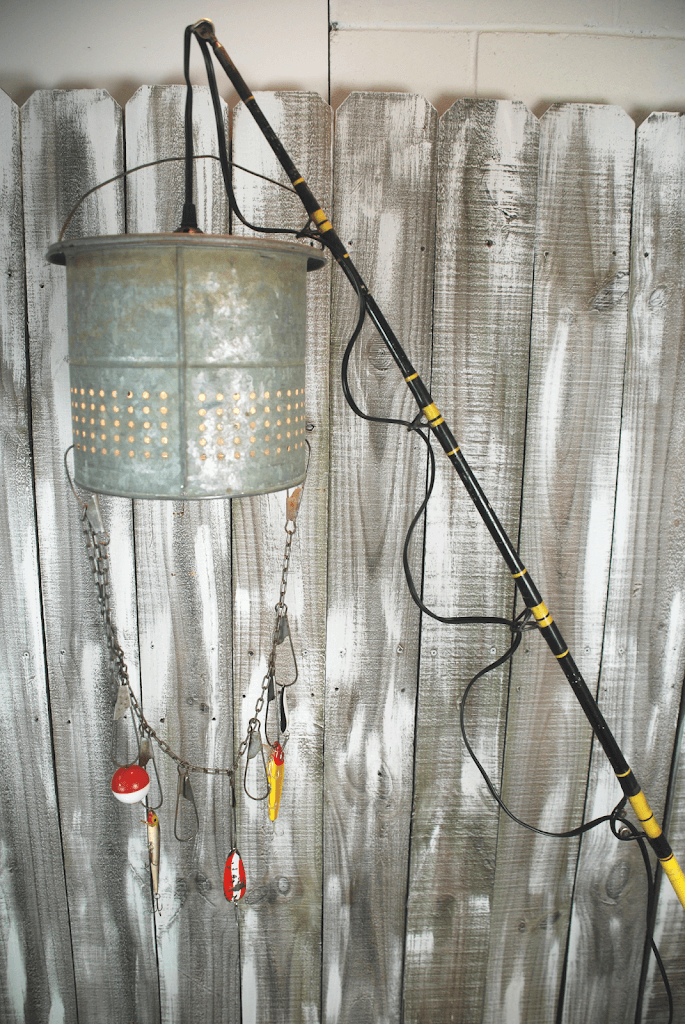
Next I clipped the metal stringer on with the clips and then hung some old lures, a bobber and a couple of spinners. Just a suggestion here you might want to remove the hooks from these or you might risk snagging something else.
Put them on which ever way looks good to you. You could even punch a small hole in some fun family fishing photo’s and hang them from the clips to remind them of a great time!
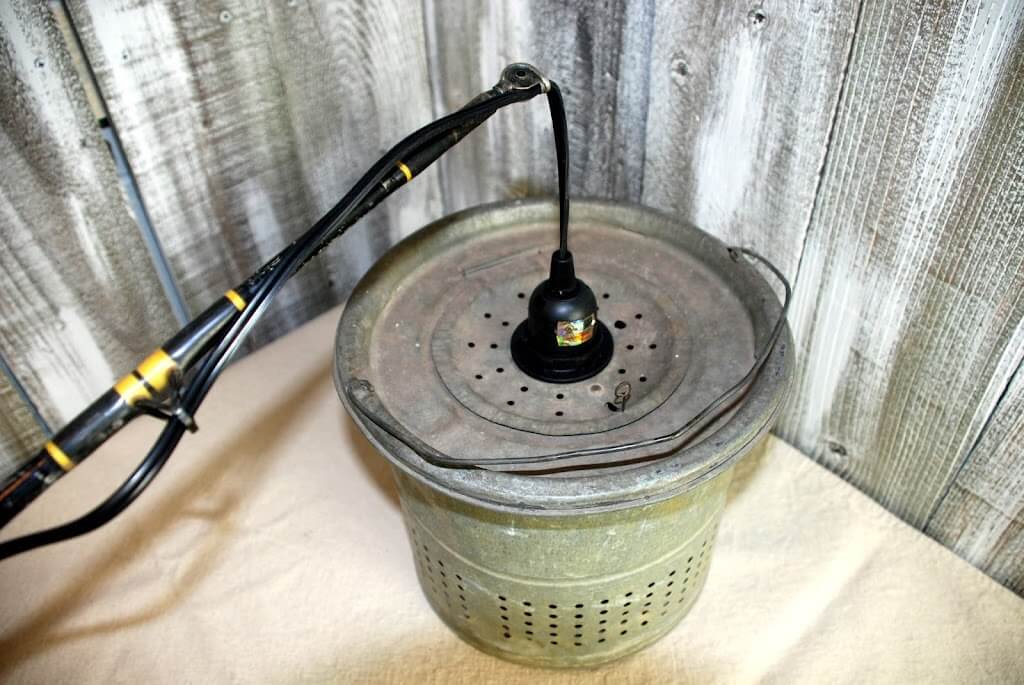
This is what it looks like hanging from your pole.
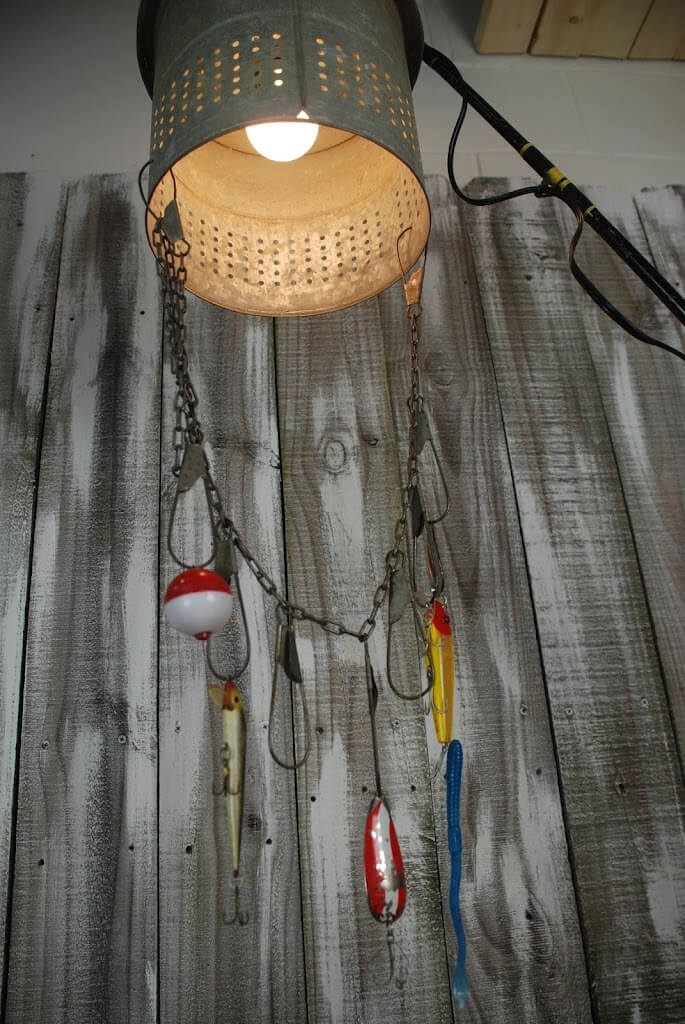
And with the light plugged in.
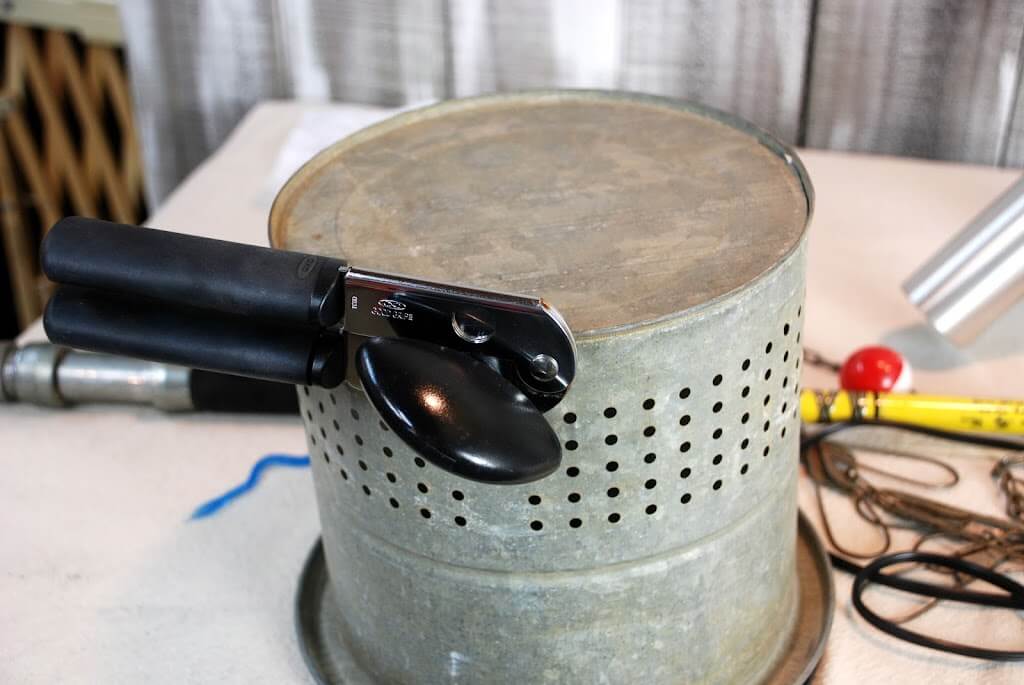
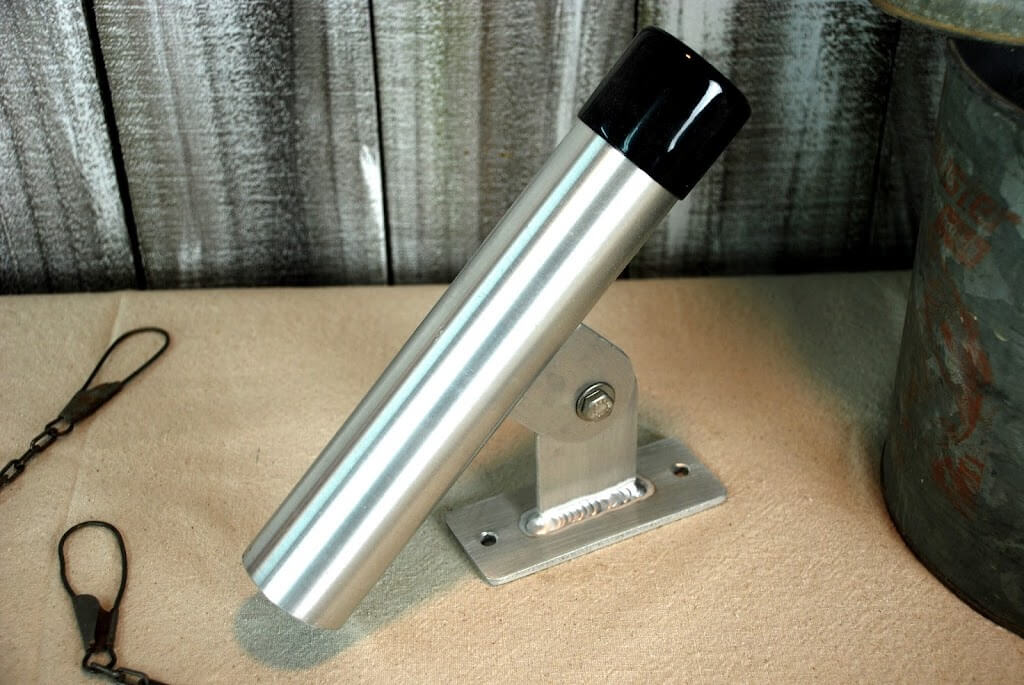
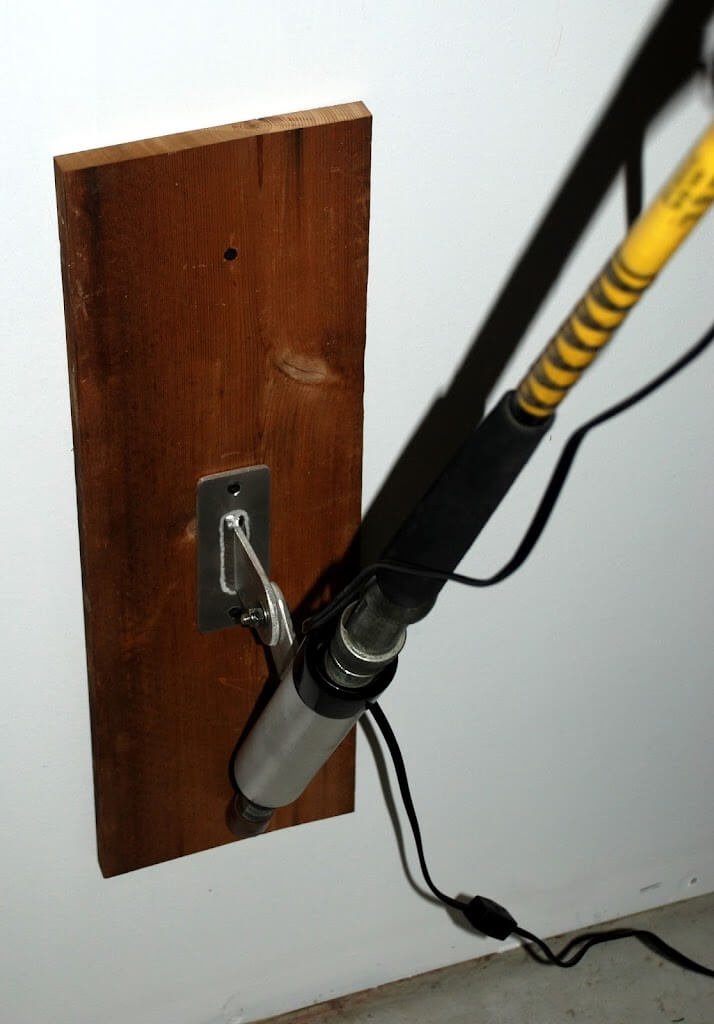
This is the fishing rod holder that is usually mounted on a boat. If you are going to mount it to a wooded section of wall, you can do so directly to the wood. If your wall is only drywall, mount it to a piece of wood and then to your wall. Make sure to set it screwed to a stud in your wall to support the weight of the entire fixture.
To a wood wall… with the wiring going down through the pole mount.
To a drywall wall… You can also see my wiring has a toggle on-off switch.
Just imagine what you can do. Here is a thought about using the outer can to decorate with. Use it to hold snacks, his favorite magazines, or a litter pail for peanut shells or Post-it-notes! It’s also magnetic!! So many possibilities!!!
Well… What do you think?