I just can’t trust bed risers that are plastic! I’m afraid that they’ll break, or that the frame leg will jump off the tiny lip at the top of the riser if it gets bumped too hard or there is too much weight put on it. Who likes the way they look? And the “you-pay-for-what-you-get” rule definitely applies to plastic. So here is my version of a bed riser that you can definitely live with for a long long time.
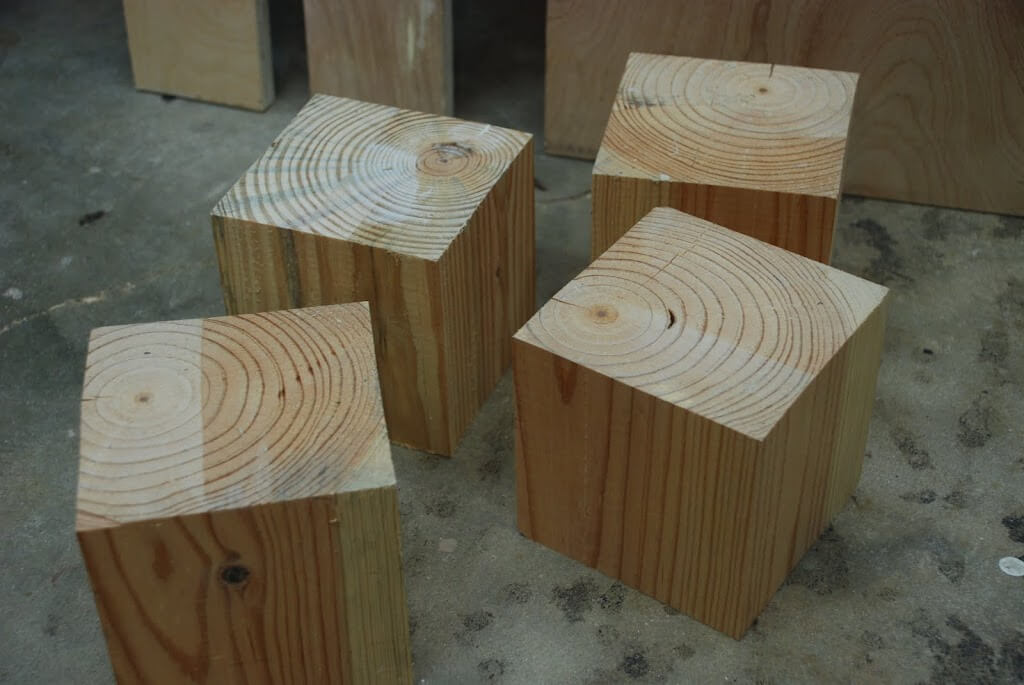
Start with solid wood blocks cut to the height that you want to add to your bed-frame.
I’m going to add under-the-bed storage that I’ll show you in my next post.
My blocks are 5″ x 5″ x 5″.
I got them cut at the lumber yard and they are perfectly level.
Before you do anything to the blocks, you need to take the plastic feet off the bed frame.

Next you need to measure the leg width of the bed frame.
Mine were 1″ across.
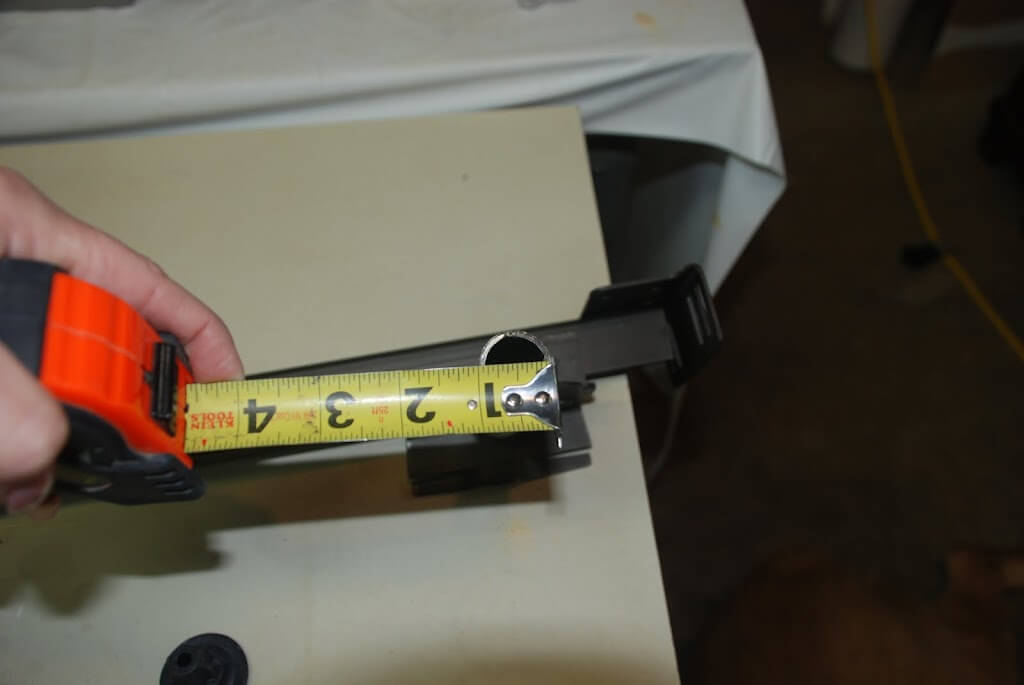
Get out a drill bit that matches the width of your bed frame leg. I used a 1 inch “Spade” Hole saw bit.
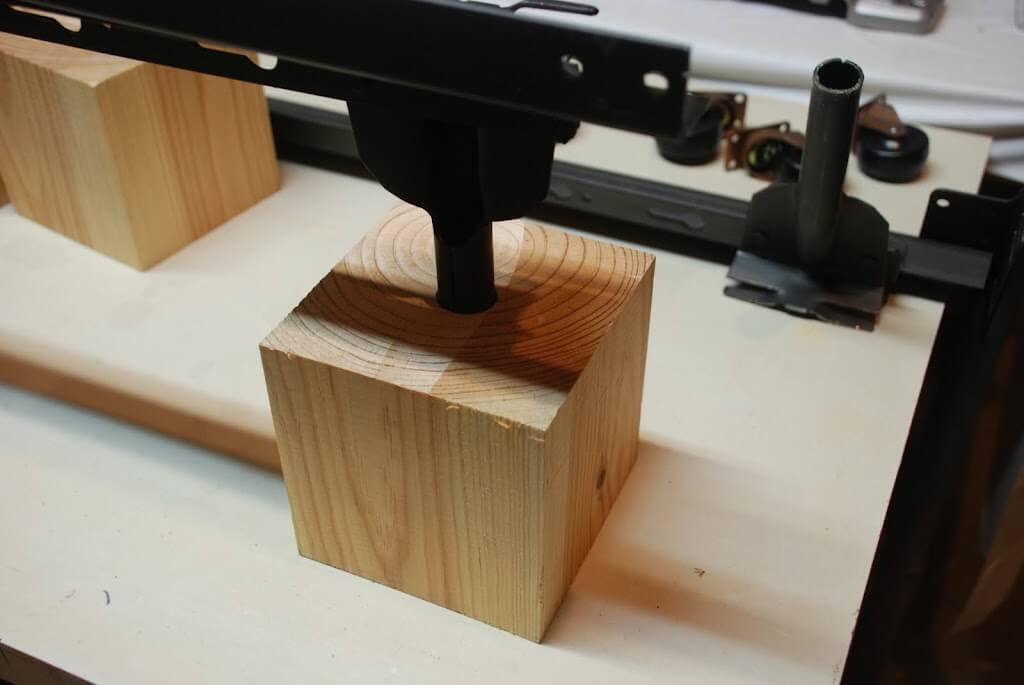
I have a drill press that I used, but you can use a hand drill if you need to.
You need to either tape or mark your bit, or adjust the drill press,
to the depth that you want the bed frame leg to fit down into the wood block.
to the depth that you want the bed frame leg to fit down into the wood block.
You do this so that the leg can’t just slide off the block if the bed is moved or bumped.
Mine was a full inch deep.
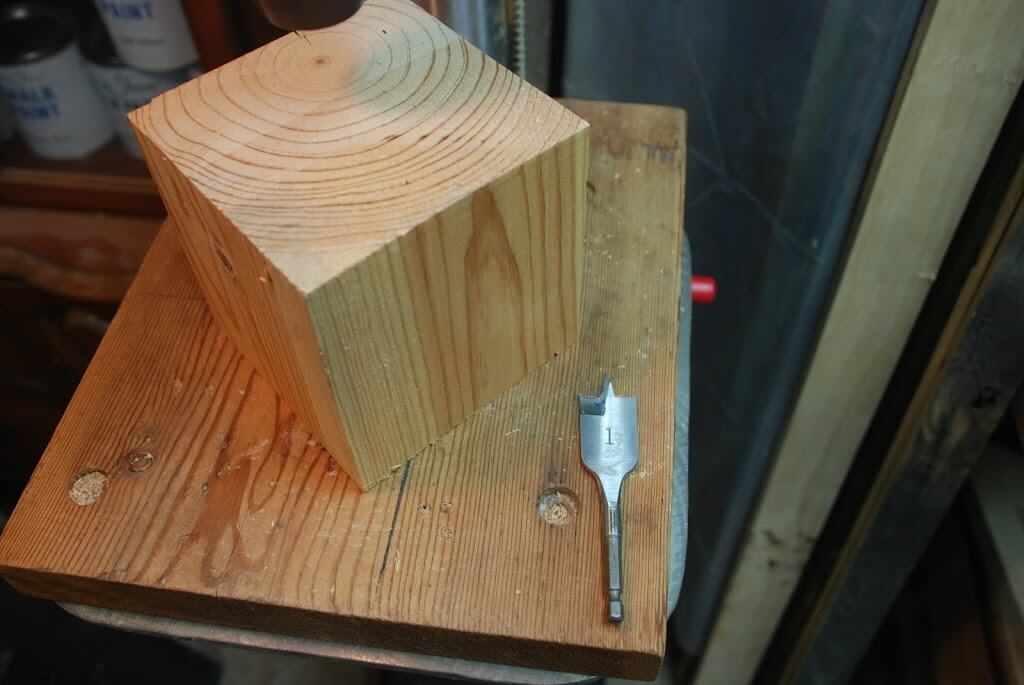
Find the center of the block and mark the starting point.
Then drill the holes.
Check each one as you finish, to make sure the depth is the same.
You want the bed to be level.

Clean them up when you’ve verified they are the same.
Make sure all of the saw dust is out of the holes and that the edges are smooth.
Use a fine grit sand paper if needed.

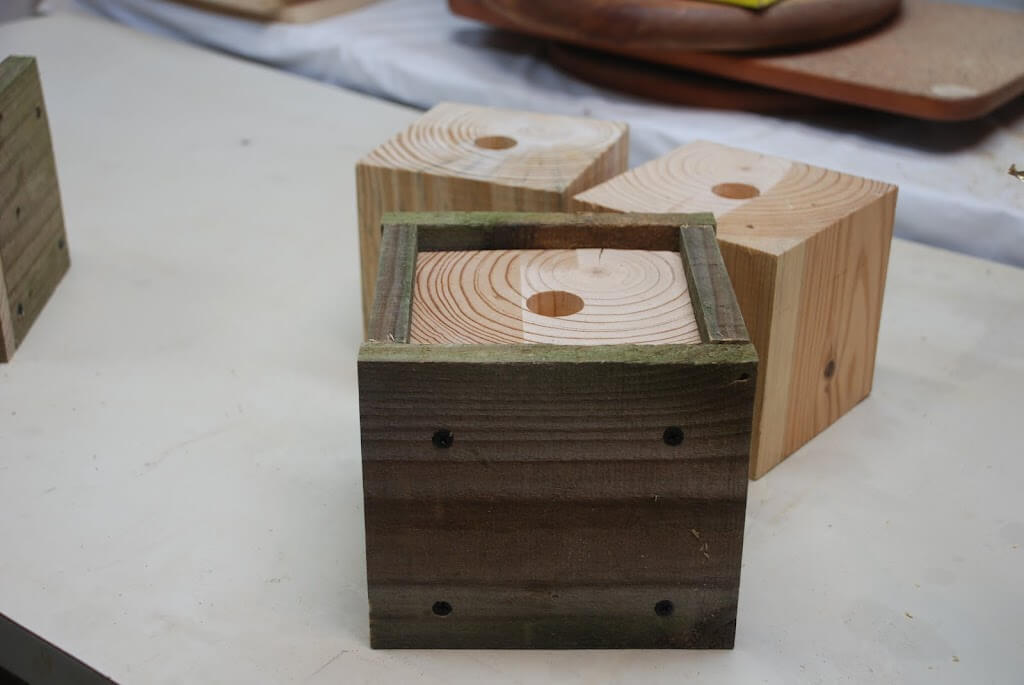
Check to make sure the bed frame legs fit into the holes and that it sits level.
Here is where you can decide how you want your riser to look.
Paint it, stain it, decoupage it, just put a sealer on it…
OR
I am making my room look a bit rustic, so I added some weathered wood around my blocks.
I then dry-brushed them with some white chalk paint.
You can see how they look under the bed, next to my roll out storage drawer.
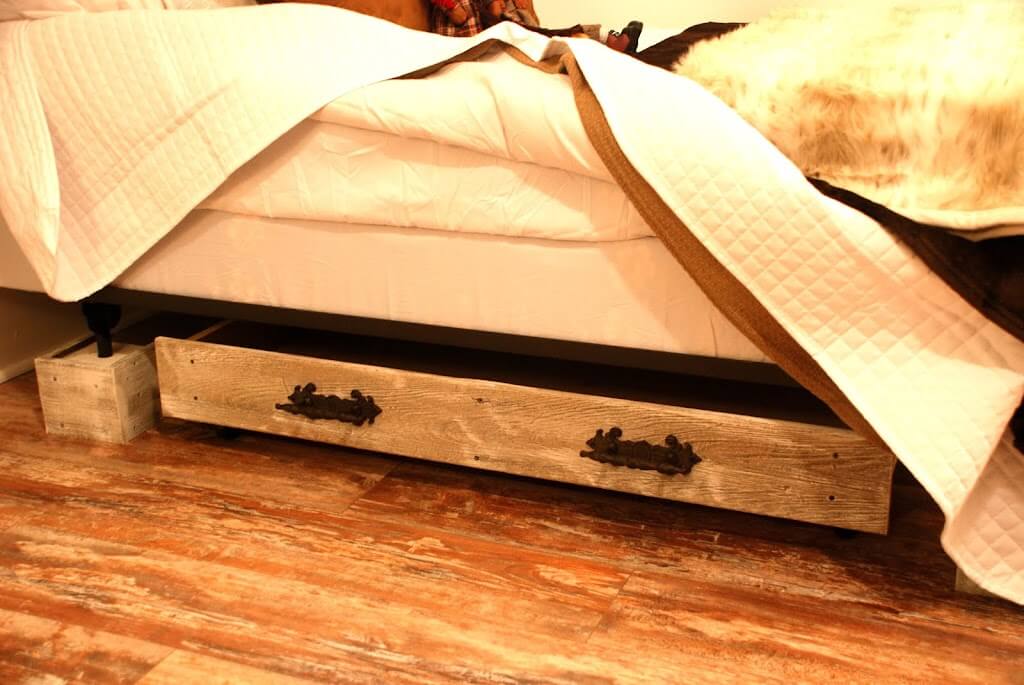
In my next post I’ll show you how I made my Roll Out Storage Drawer.
Join me on my journey
Living and Celebrating Autumn All Year!
Debbie
www.autumnaire.com
www.autumnaire.com