PINCUSHION PROJECT
In my previous post I talked about my pincushion project and thought I would share the directions. They make a great gift for the person that has everything and are a quick and easy to make. This is my first written tutorial, so I hope I cover everything just right so you can understand me. If you have any questions or need clarification on something, please just email me debbie@autumnaire.com
and I’ll get right back to you.
and I’ll get right back to you.
I hope you enjoy these as much as I do!
Debbie
Canning Jar Lid Pincushion Tutorial
Please read through all of the instructions first before gathering supplies.
There are some tips that may help you decide what you need.
Step 1
Because this goes pretty quickly you need to gather all of your supplies.
For each pincushion you will need:
1 canning jar lid with the screw on ring (pint or quart size)
1/2 of a Styrofoam ball (pint size = 2 1/2 inch ball or quart size = 3″ ball)
Small scrap of fabric enough to cover your Styrofoam and tuck underneath
Package of about 50 – 1 inch straight pins
4 – 1 1/2 inch straight pins or decorator pins with pearls on head of pin
Approximately 50 pearl beads or just pins with pearl heads optional
Matching gimp or trim to cover ring
Hot glue
1 jar to rest ball on while gluing
Something to cut your Styrofoam ball with
Ice pick or nail and hammer to punch small holes into the lid
Optional additional embellishments
Step 2
Depending on the size of your jar lid, cut the appropriate size Styrofoam ball in half. I use a fine blade hack saw because the blade and teeth of the saw are small and they cause the least amount of damage to the ball. This allows you to use the second half. Or you can just use anything you have available.
Step 3
Cover your Styrofoam with your fabric scrap and glue in place. (Glue on the round side of the ball around the very edge of your cut, not on the flat side. This makes a kind of ledge that keeps your ball from falling through the lid.) Make sure to pull fabric tight to eliminate any puckering of the fabric above where the ring will cover the ball. I glue and pin to help keep the fabric from pulling away from where I’ve already glued. Then take the pins out after the glue cools.
Step 4
Place the ring on the ball and position it so that the rounded part of the ball is protruding through the top of the ring and before you glue it in place, make sure that you have room to glue your fabric down later and still end up with room for more glue and the lid. You want your lid to end up even with the bottom of the ring. If it doesn’t go up into the ring far enough it won’t look right and if it goes up too far your legs will not show. Once you’ve made the room you need glue it in place. but don’t glue the underside of your ball yet.
Step 5
Take the lid and mark the largest triangle on the under side of the lid that you have space for. The three points on the triangle are where your wholes need to be punched for the feet of the pincushion. I use an ice pick and hammer. Just a tap or two and you’ll have a small hole that your pin can push up into to support your legs. If you don’t have an ice pick, use a small nail. Just watch out for your fingers.
Step 6
On the underside of your ball, trim the fabric to about 1/2 inch all the way around, and glue and pin it down. Allow it to cool and remove the pins.
Step 7
Next take the lid with the three holes punched and glue it in place to cover the fabric edges. Making sure that the writing on the lid is where it will show on the bottom of the pincushion. I use a jar to rest the ring upside down on so that gluing is easier and the glue doesn’t pool to one side, making a level place for the flat lid to rest. This is where I use the most glue. You want your lid to end up even with the bottom of the ring. If it doesn’t go up into the ring far enough it will stick out and won’t look just right, and if it goes up too far your decorative legs will not show. Allow it to cool.
Step 8
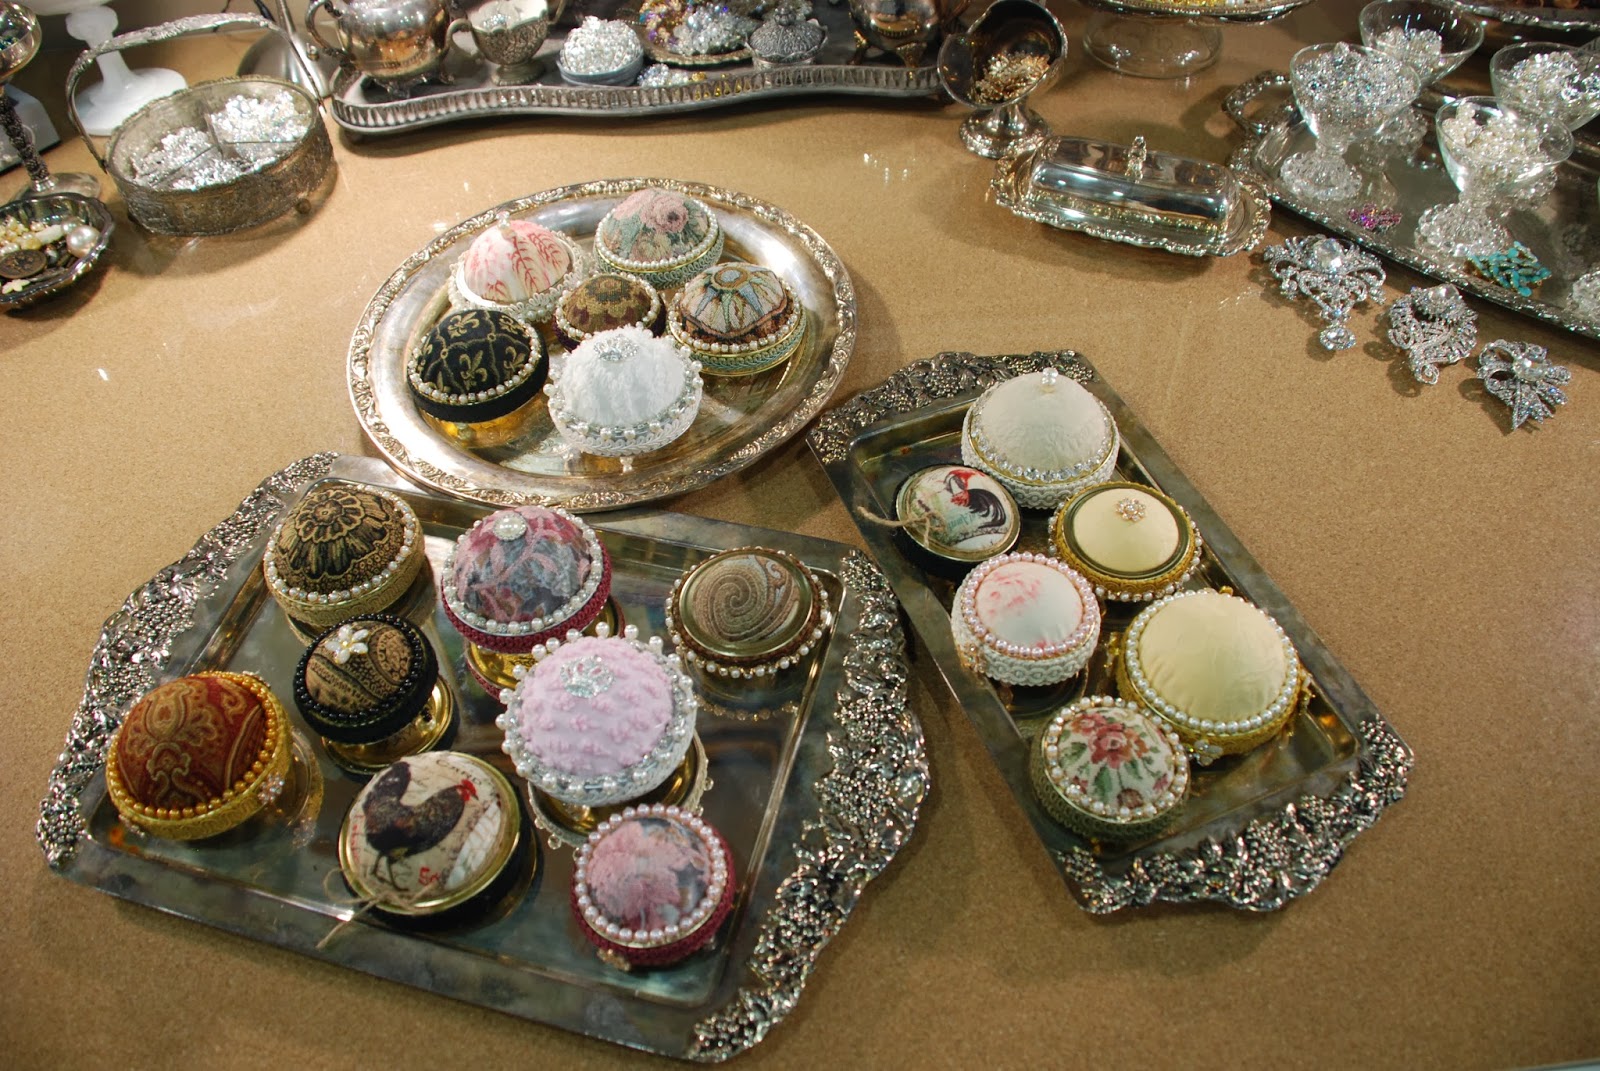
Decorate your pincushion. Use the straight pins to pin pearls or beads around the base of the ball. Make the legs by using the longer straight pins with multiple beads of varying sizes allowing for some pin length to glue up into the Styrofoam ball. Glue gimp or trims of your choice around the ring, and add any embellishments you want to make you treasure perfect.
This photo shows the triangle for the leg placement.

This photo shows that the lid ends up flush with the bottom of the ring with the writing side down.

This photo shows the leg height and gimp on ring.

This photo shows the pins and pearls around the ball.

These next two photos show different embellishment options.


Email me pictures of your pincushion creation at debbie@autumnaire.com I’m excited to see what you come up with! And I’d love to feature some of them in a future post!